> ## Documentation Index
> Fetch the complete documentation index at: https://dub-client-tracking-lead-sale.mintlify.site/llms.txt
> Use this file to discover all available pages before exploring further.
# Client-side conversion tracking
> Learn how to use the @dub/analytics script to track conversion events on the client-side
`@dub/analytics` is a client-side script for [tracking conversion events](/conversions/quickstart) with Dub.
By default, the script handles the detection of the `dub_id` query parameter and storing it as a first-party cookie:
 Then, when a conversion event occurs (e.g. a user signs up for an account), you can check for the `dub_id` cookie and attribute the conversion to the original click by [tracking a lead event](/conversions/leads/introduction).
 Finally, when the user completes a purchase (e.g. subscribing to a plan, purchasing a product, etc.), you can [track a sale event](/conversions/sales/introduction). Under the hood, Dub will automatically attribute the sale to the original link click.
 ## Quickstart
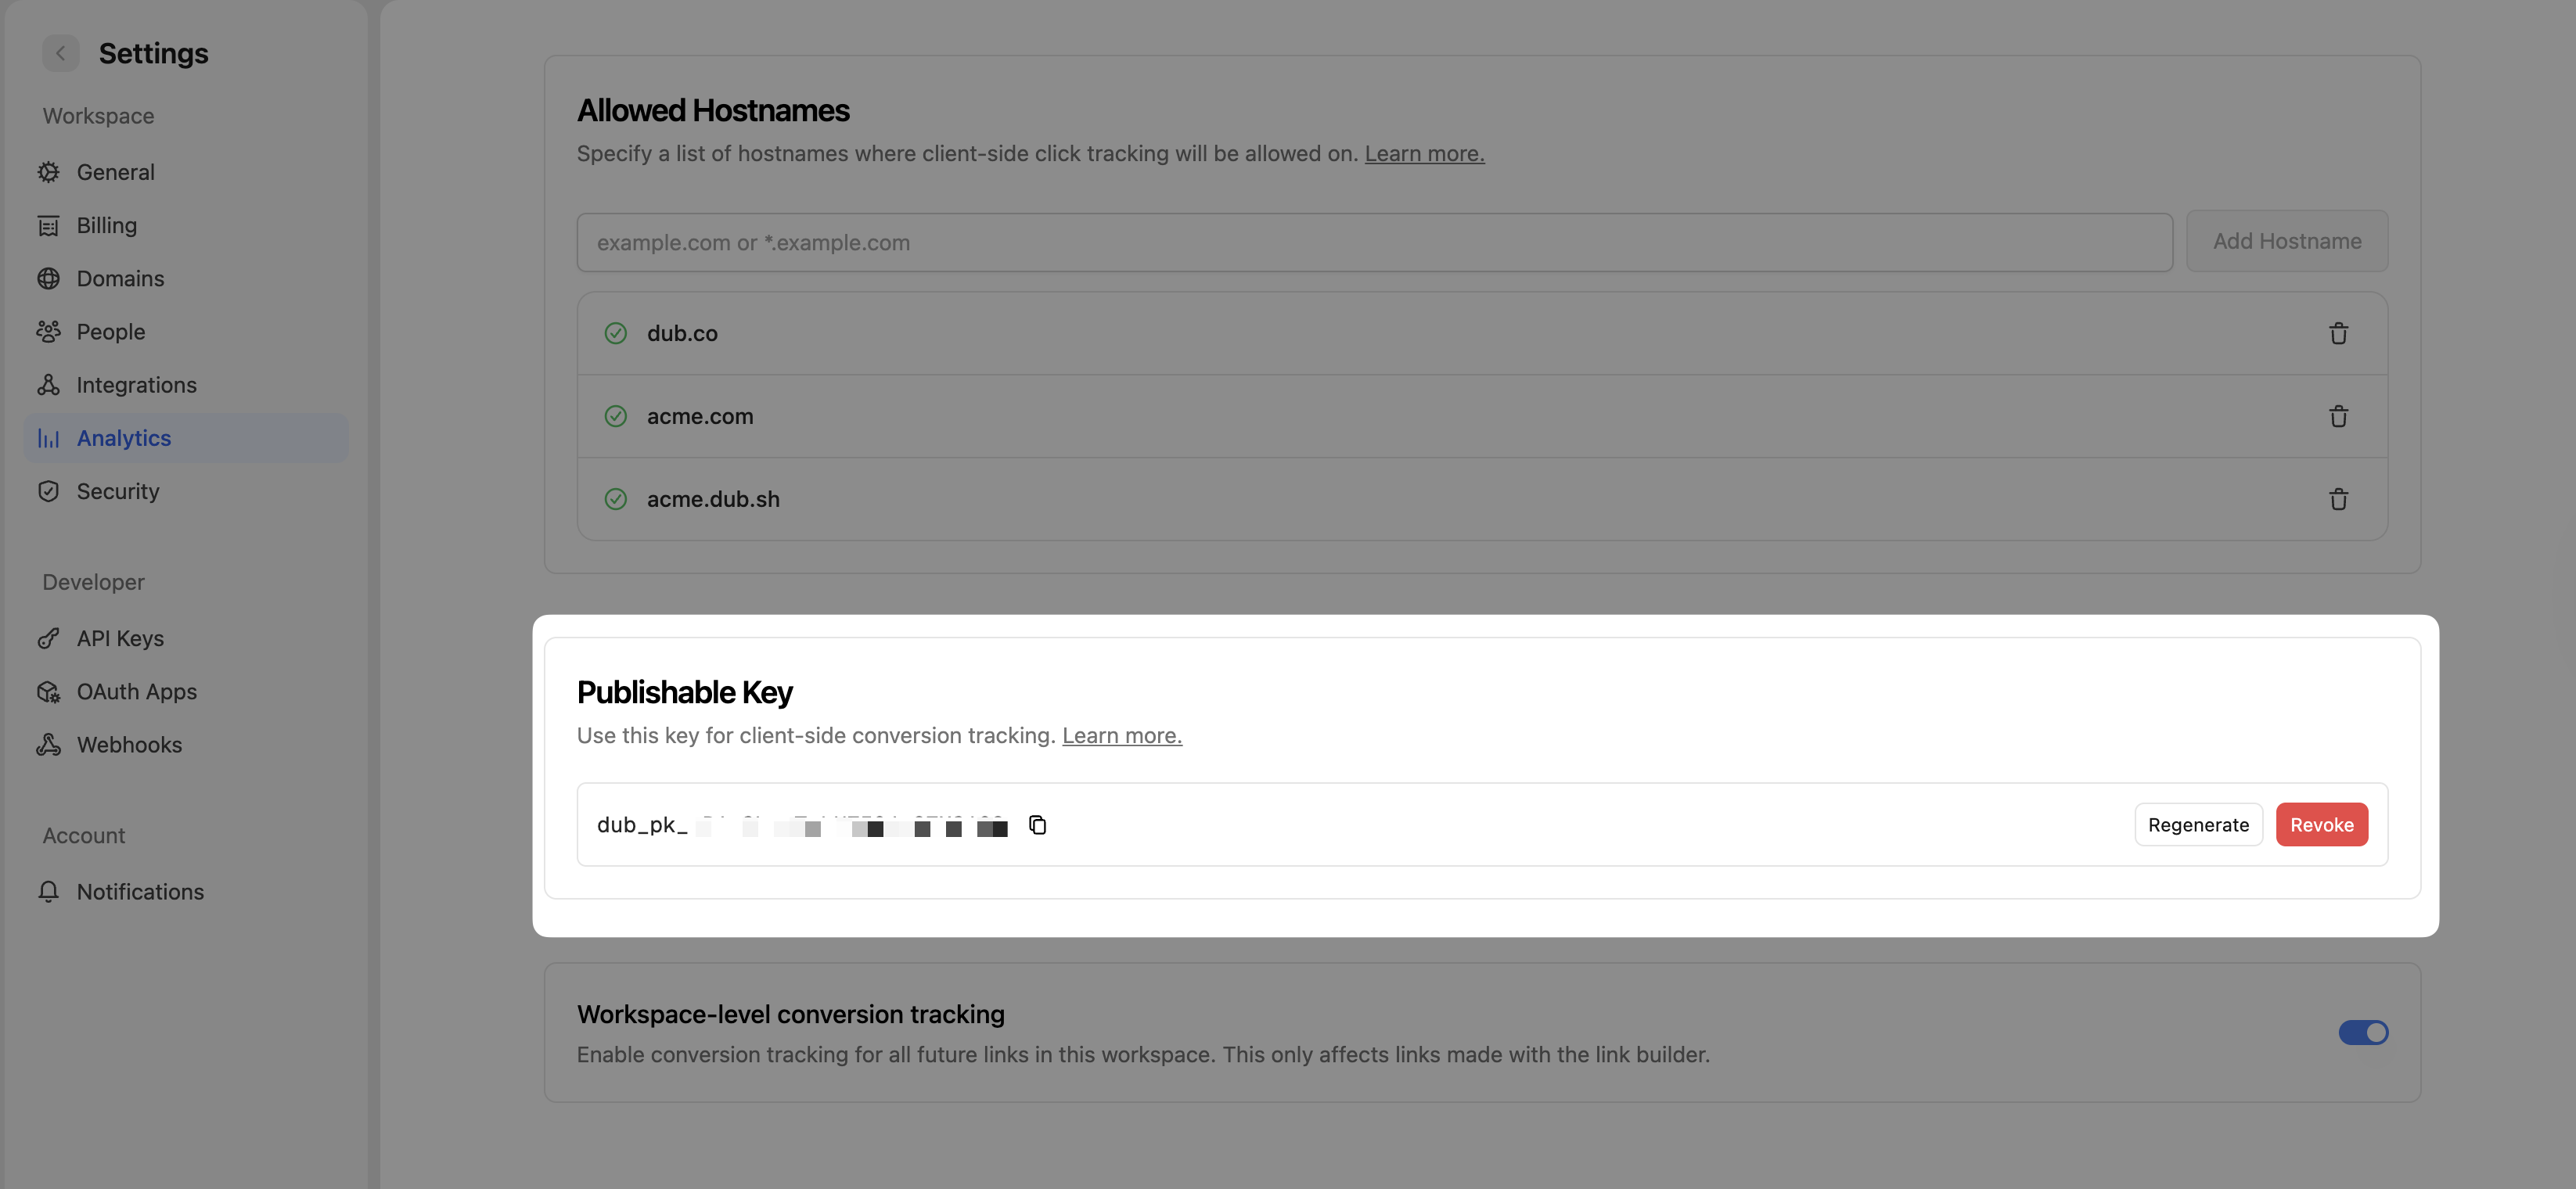
Before you can track conversions on the client-side, you need to generate a publishable key from your Dub workspace.
To do that, navigate to your [workspace's Analytics settings page](https://app.dub.co/settings/analytics) and generate a new publishable key under the **Publishable Key** section.
## Quickstart
Before you can track conversions on the client-side, you need to generate a publishable key from your Dub workspace.
To do that, navigate to your [workspace's Analytics settings page](https://app.dub.co/settings/analytics) and generate a new publishable key under the **Publishable Key** section.
 Then, you'll need to allowlist your site's domain to allow the client-side conversion events to be ingested by Dub.
To do that, navigate to your [workspace's Analytics settings page](https://app.dub.co/settings/analytics) and add your site's domain to the **Allowed Hostnames** list.
This provides an additional layer of security by ensuring only authorized domains can track conversions using your publishable key.
Then, you'll need to allowlist your site's domain to allow the client-side conversion events to be ingested by Dub.
To do that, navigate to your [workspace's Analytics settings page](https://app.dub.co/settings/analytics) and add your site's domain to the **Allowed Hostnames** list.
This provides an additional layer of security by ensuring only authorized domains can track conversions using your publishable key.
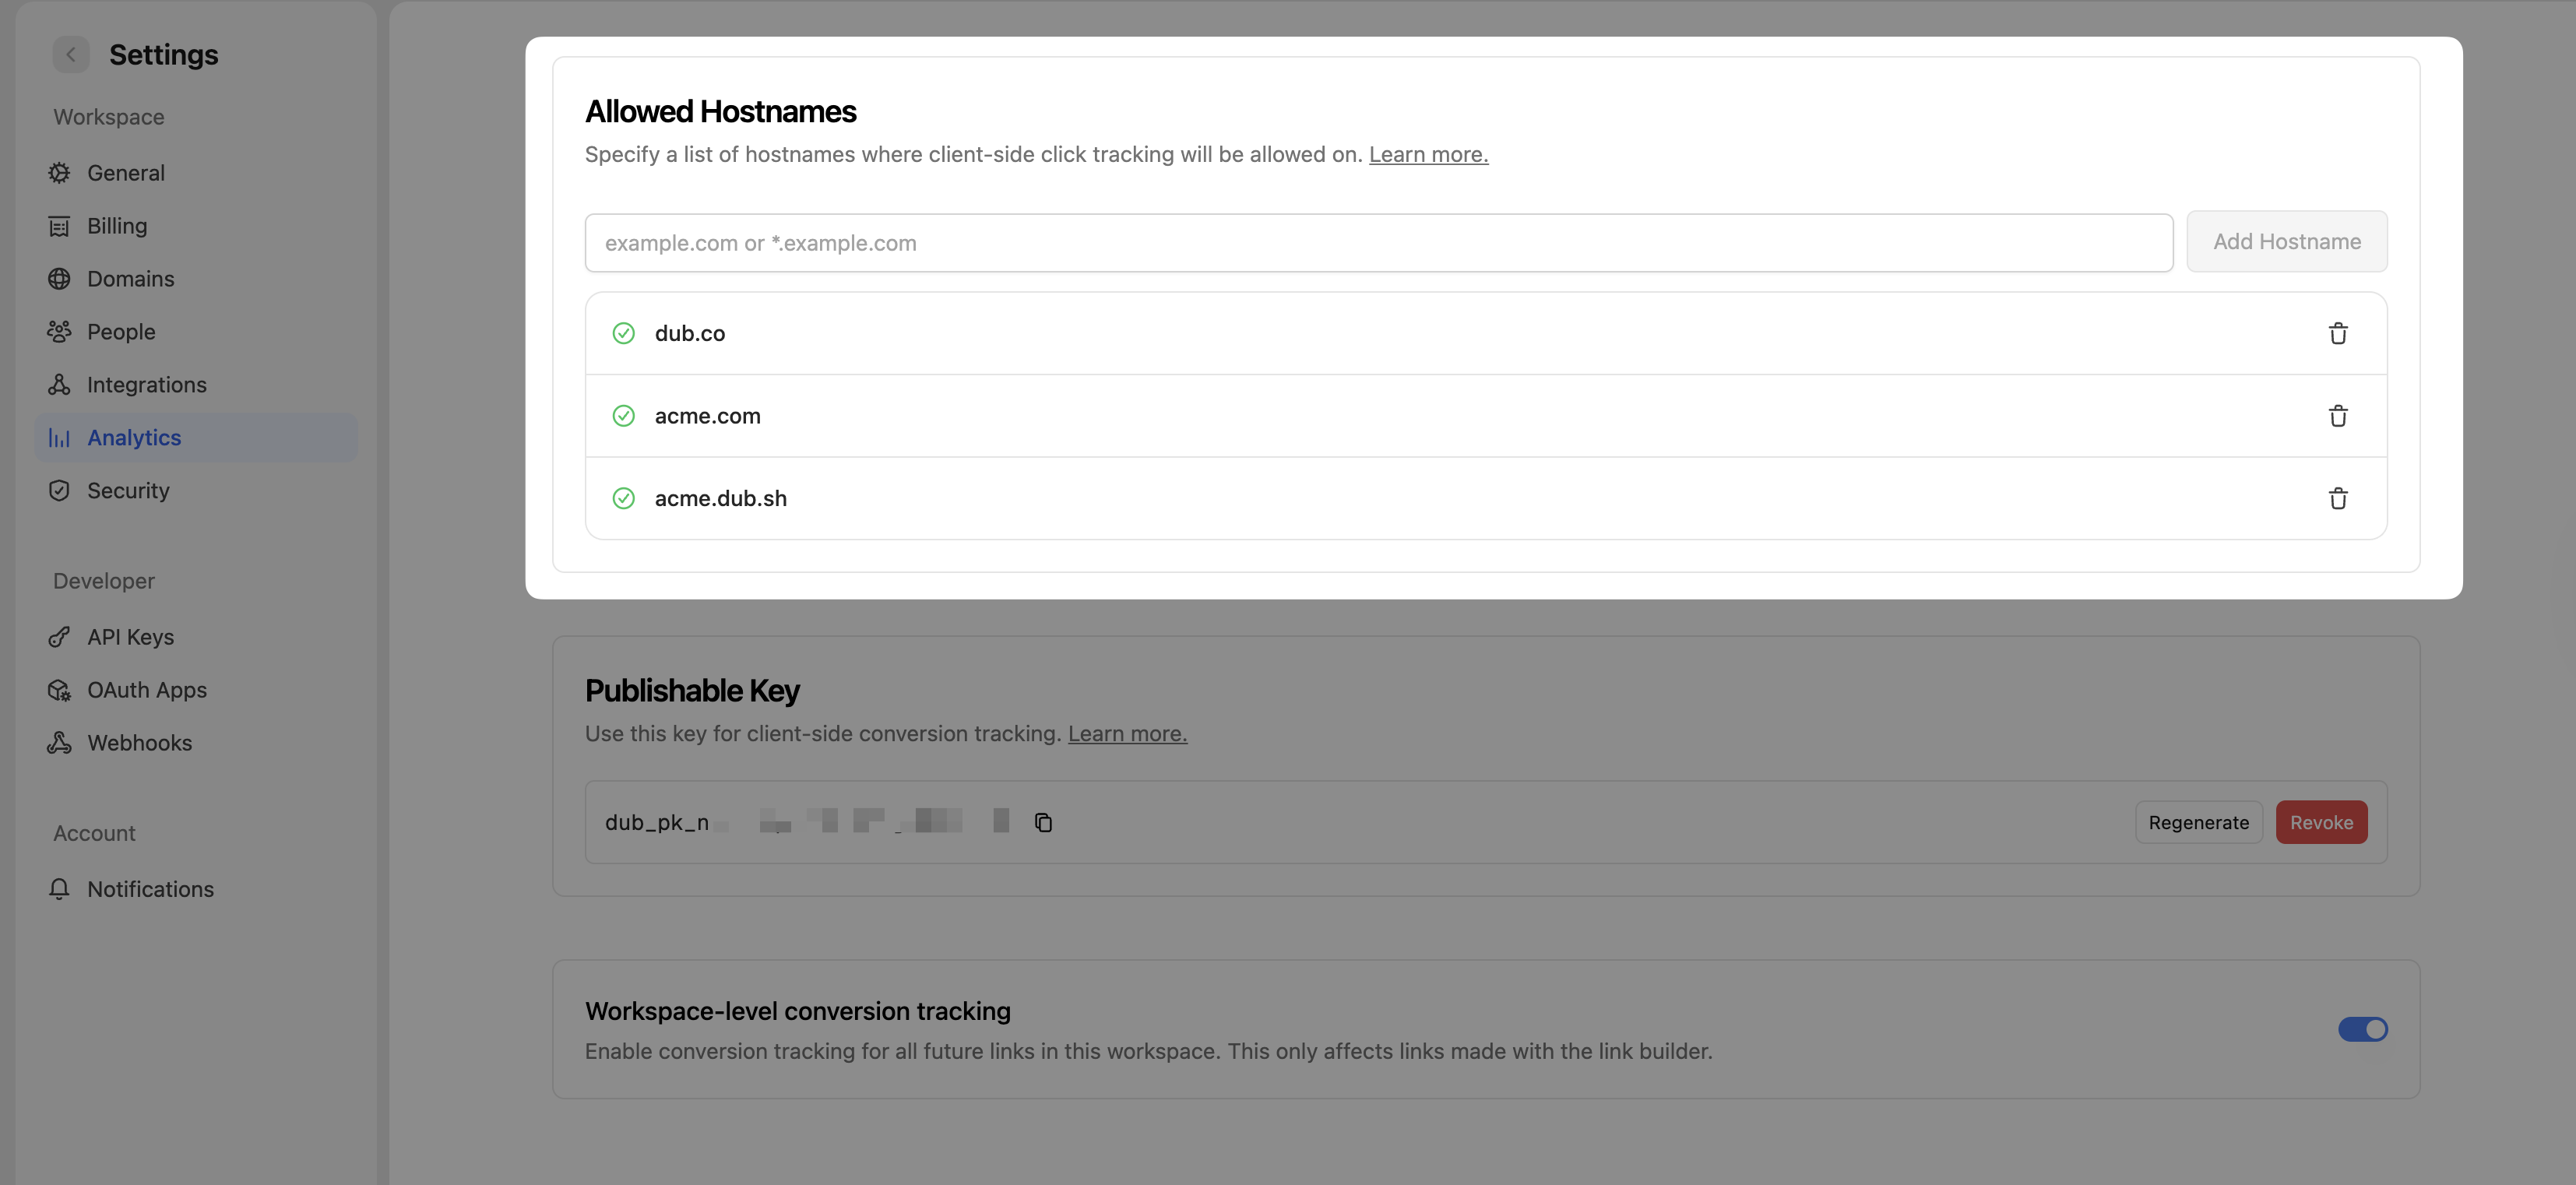 You can group your hostnames when adding them to the allow list:
* `example.com`: Tracks traffic **only** from `example.com`.
* `*.example.com`: Tracks traffic from **all subdomains** of `example.com`, but **not** from `example.com` itself.
When testing things out locally, you can add `localhost` to the **Allowed
Hostnames** list temporarily. This will allow local events to be ingested by
Dub. Don't forget to remove it once you're ready to go live!
Next, install the Dub analytics script in your application.
You can install the `@dub/analytics` script in several different ways:
Add Dub Analytics to your React app
Add Dub Analytics to your website
Add Dub Analytics via GTM
}
href="/sdks/client-side/installation-guides/framer"
>
Add Dub Analytics to your Framer site
Add Dub Analytics to your Shopify store
Add Dub Analytics to your WP site
Add Dub Analytics to your Webflow site
You must configure the **publishable key** you generated in step 1 when installing the analytics script. Without this key, client-side conversion tracking will not work.
```typescript React
import { Analytics as DubAnalytics } from '@dub/analytics/react';
export default function RootLayout({
children,
}) {
return (
{children}
);
}
```
```html Other
```
## Client-side lead tracking
Once the analytics script is installed, you can start tracking lead events in your application on the client-side.
Here are the quickstart examples for tracking lead events:
```typescript React
import { useAnalytics } from "@dub/analytics/react";
import { useState } from "react";
export function SignUpForm() {
const { trackLead } = useAnalytics();
const [name, setName] = useState("");
const [email, setEmail] = useState("");
const handleSubmit = (e: React.FormEvent) => {
e.preventDefault();
// Track the lead event
trackLead({
eventName: "Sign Up",
customerExternalId: email,
customerName: name,
customerEmail: email,
});
};
return (
);
}
```
```html Other
Sign Up
```
Here's the full list of attributes you can pass when sending a lead event:
| Property | Required | Description |
| :------------------- | :------- | :----------------------------------------------------------------------------------------------------------------------- |
| `clickId` | **Yes** | The unique `dub_id` parameter that the lead conversion event is attributed to. |
| `eventName` | **Yes** | The name of the event. Example: "Sign up". |
| `customerExternalId` | **Yes** | The unique ID of the customer in your system. Will be used to identify and attribute all future events to this customer. |
| `customerEmail` | No | The email address of the customer. If not passed, a random email address will be generated. |
| `customerName` | No | The name of the customer. If not passed, a random name will be generated (e.g. "Big Red Caribou"). |
| `customerAvatar` | No | The avatar URL of the customer. If not passed, a random avatar URL will be generated. |
**When to track leads**
You should track lead events after successful user actions such as:
* User registration or account creation
* Newsletter subscription
* Contact form submission
* Demo request or trial signup
* Download of gated content
Ensure the event is triggered **only after the backend confirms the action was completed successfully**. This guarantees accurate lead data and prevents false or incomplete entries.
## Client-side sale tracking
Once the analytics script is installed, you can start tracking sale events in your application on the client-side.
```typescript React
import { useAnalytics } from "@dub/analytics/react";
import { useState } from "react";
export function CheckoutForm() {
const { trackSale } = useAnalytics();
// …
}
const handleSubmit = (e: React.FormEvent) => {
e.preventDefault();
// Track the sale event
trackSale({
eventName: "Purchase",
customerExternalId: "cus_RBfbD57H",
amount: 5000, // $50.00
invoiceId: "in_1MtHbELkdIwH",
});
};
return (
);
}
```
```html Other
Checkout
```
Here are the properties you can include when sending a sale event:
| Property | Required | Description |
| :------------------- | :------- | :----------------------------------------------------------------------------------------------------------------------------------------------------- |
| `customerExternalId` | **Yes** | The unique ID of the customer in your system. Will be used to identify and attribute all future events to this customer. |
| `amount` | **Yes** | The amount of the sale in cents. |
| `paymentProcessor` | No | The payment processor that processed the sale (e.g. [Stripe](/conversions/sales/stripe), [Shopify](/conversions/sales/shopify)). Defaults to "custom". |
| `eventName` | No | The name of the event. Defaults to "Purchase". |
| `invoiceId` | No | The invoice ID of the sale. Can be used as a idempotency key – only one sale event can be recorded for a given invoice ID. |
| `currency` | No | The currency of the sale. Defaults to "usd". |
| `metadata` | No | An object containing additional information about the sale. |
**When to track sale**
Track sale events only after a user successfully completes a purchase or payment-related action, such as:
* Completing a checkout or order
* Subscription payment
* Invoice payment
* Any paid trial or demo conversion
Ensure the event is triggered **only after the backend confirms the payment was successful**. This guarantees accurate sale data and prevents false or incomplete entries.
You can group your hostnames when adding them to the allow list:
* `example.com`: Tracks traffic **only** from `example.com`.
* `*.example.com`: Tracks traffic from **all subdomains** of `example.com`, but **not** from `example.com` itself.
When testing things out locally, you can add `localhost` to the **Allowed
Hostnames** list temporarily. This will allow local events to be ingested by
Dub. Don't forget to remove it once you're ready to go live!
Next, install the Dub analytics script in your application.
You can install the `@dub/analytics` script in several different ways:
Add Dub Analytics to your React app
Add Dub Analytics to your website
Add Dub Analytics via GTM
}
href="/sdks/client-side/installation-guides/framer"
>
Add Dub Analytics to your Framer site
Add Dub Analytics to your Shopify store
Add Dub Analytics to your WP site
Add Dub Analytics to your Webflow site
You must configure the **publishable key** you generated in step 1 when installing the analytics script. Without this key, client-side conversion tracking will not work.
```typescript React
import { Analytics as DubAnalytics } from '@dub/analytics/react';
export default function RootLayout({
children,
}) {
return (
{children}
);
}
```
```html Other
```
## Client-side lead tracking
Once the analytics script is installed, you can start tracking lead events in your application on the client-side.
Here are the quickstart examples for tracking lead events:
```typescript React
import { useAnalytics } from "@dub/analytics/react";
import { useState } from "react";
export function SignUpForm() {
const { trackLead } = useAnalytics();
const [name, setName] = useState("");
const [email, setEmail] = useState("");
const handleSubmit = (e: React.FormEvent) => {
e.preventDefault();
// Track the lead event
trackLead({
eventName: "Sign Up",
customerExternalId: email,
customerName: name,
customerEmail: email,
});
};
return (
);
}
```
```html Other
Sign Up
```
Here's the full list of attributes you can pass when sending a lead event:
| Property | Required | Description |
| :------------------- | :------- | :----------------------------------------------------------------------------------------------------------------------- |
| `clickId` | **Yes** | The unique `dub_id` parameter that the lead conversion event is attributed to. |
| `eventName` | **Yes** | The name of the event. Example: "Sign up". |
| `customerExternalId` | **Yes** | The unique ID of the customer in your system. Will be used to identify and attribute all future events to this customer. |
| `customerEmail` | No | The email address of the customer. If not passed, a random email address will be generated. |
| `customerName` | No | The name of the customer. If not passed, a random name will be generated (e.g. "Big Red Caribou"). |
| `customerAvatar` | No | The avatar URL of the customer. If not passed, a random avatar URL will be generated. |
**When to track leads**
You should track lead events after successful user actions such as:
* User registration or account creation
* Newsletter subscription
* Contact form submission
* Demo request or trial signup
* Download of gated content
Ensure the event is triggered **only after the backend confirms the action was completed successfully**. This guarantees accurate lead data and prevents false or incomplete entries.
## Client-side sale tracking
Once the analytics script is installed, you can start tracking sale events in your application on the client-side.
```typescript React
import { useAnalytics } from "@dub/analytics/react";
import { useState } from "react";
export function CheckoutForm() {
const { trackSale } = useAnalytics();
// …
}
const handleSubmit = (e: React.FormEvent) => {
e.preventDefault();
// Track the sale event
trackSale({
eventName: "Purchase",
customerExternalId: "cus_RBfbD57H",
amount: 5000, // $50.00
invoiceId: "in_1MtHbELkdIwH",
});
};
return (
);
}
```
```html Other
Checkout
```
Here are the properties you can include when sending a sale event:
| Property | Required | Description |
| :------------------- | :------- | :----------------------------------------------------------------------------------------------------------------------------------------------------- |
| `customerExternalId` | **Yes** | The unique ID of the customer in your system. Will be used to identify and attribute all future events to this customer. |
| `amount` | **Yes** | The amount of the sale in cents. |
| `paymentProcessor` | No | The payment processor that processed the sale (e.g. [Stripe](/conversions/sales/stripe), [Shopify](/conversions/sales/shopify)). Defaults to "custom". |
| `eventName` | No | The name of the event. Defaults to "Purchase". |
| `invoiceId` | No | The invoice ID of the sale. Can be used as a idempotency key – only one sale event can be recorded for a given invoice ID. |
| `currency` | No | The currency of the sale. Defaults to "usd". |
| `metadata` | No | An object containing additional information about the sale. |
**When to track sale**
Track sale events only after a user successfully completes a purchase or payment-related action, such as:
* Completing a checkout or order
* Subscription payment
* Invoice payment
* Any paid trial or demo conversion
Ensure the event is triggered **only after the backend confirms the payment was successful**. This guarantees accurate sale data and prevents false or incomplete entries.